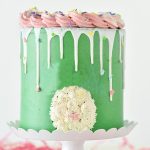
Cake Decorating – Drip Cake & Pipping Skills Notes & Recipes
Our classes are as much about learning to cook as they are a sociable experience. We hope you enjoyed your day and are ready to recreate your drip cake at home.
Chocolate Buttercream
Ingredients
- 350g melted dark chocolate
- 500g butter
- 500g sifted icing sugar
Method
- Melt chocolate.
- Beat together softened butter & icing sugar until very fluffy – scrape down.
- Add melted chocolate.
- Beat until smooth.
*WARNING*
- If you have to beat the buttercream during use (as it firms up) be aware that the more you beat it the lighter it will go due to aeration.
- It will be fine to use but may look like it’s a completely different colour.
Vanilla Buttercream
Ingredients
- 500g butter
- 500g sifted icing sugar
1 Tsp Vanilla Flavouring
Food colour of choice – Gel is my Favourite – Couple of Drops
Method
- Beat together softened butter & icing sugar until very fluffy – scrape down
- Beat until smooth
- Add colour if desired or use it as it is
*WARNING*
If you have to beat the buttercream during use (as it firms up) be aware that the more you beat it the lighter it will go due to aeration.
It will be fine to use but may look like it’s a completely different colour.
WILL KEEP IN THE FRIDGE FOR 3 WEEKS
CAN BE FROZEN
Chocolate Sponge
Ingredients
- 200g butter or margarine
- 200g castor sugar
- 4 eggs
- 175g self raising flour
- 25g cocoa powder
- 2 tablespoons milk
Method
- Cocoa powder has a tightening effect on the cake batter, milk will loosen it slightly and bring it to the correct dropping consistency.
- Cream the fat and the sugar until fluffy.
- Add the beaten eggs slowly (in 3 parts)
- Fold in sieved flour & cocoa powder
- Stir in milk – lightly mix.
- Pour into 8” ring lined with greaseproof paper – this recipe will yield 1 x 8” round.
- Bake 140`c for 40 mins or until firm to the touch.
- If you want Vanilla sponge use 200g flour and leave the cocoa powder out.
- This recipe can be used for cupcakes – bake 140`c for approx. 15 mins.
Vanilla Sponge
Ingredients
- 200g butter or margarine
- 200g castor sugar
- 4 eggs
- 200g self raising flour
- 2 tablespoons milk
Method
- Cream the fat and the sugar until fluffy.
- Add the beaten eggs slowly (in 3 parts)
- Fold in sifted flour
- Stir in milk – lightly mix.
- Pour into 8” ring lined with greaseproof paper – this recipe will yield 1 x 8” round.
- Bake 140`c for 40 mins or until firm to the touch.
- This recipe can be used for cupcakes – bake 140`c for approx. 15 mins.
Stack Cake
Stack all cool sponge on top of one another.
Place cake board on top of the sponge and cut round using a sharp knife.
Make sure that you keep the knife straight or you will create a plant pot shape
Slice layers of sponge in half and add filling – fudge, buttercream, jam etc.
NEVER PUT JAM & BUTTERCREAM ON THE SAME LAYERAS THEY WILL SLIDE!!!
DOWELLING THE CAKE
Dowel rods are used to support the weight of the upper tiers
NEVER TRY TO STACK CAKES WITHOUT DOWELS OR THEY WILL SINK!!!
Stick the dowel rods directly into the cake until it hits the cake board.
Use a knife as a gauge and score where the top of the cake is
Score with sharp knife and snap the dowel rod (it should break cleanly)
Place dowel rods back into sponge
Place thin cake board over the base sponge (containing dowel rods)
Place sponge on top of thin cake board – your cake will now take the weight without sinking
For larger cakes you can use thicker dowel rods or plastics.
Best tip – make sure dowels are even in length and not poking out of your sponge!
Coating with Buttercream
Beat buttercream until soft.
Use a dry palette knife “splodge” large amount of buttercream onto the back of the cake.
You stand at 6 o`clock – place buttercream on at 12 O`clock
Paddle palette knife and slide around cake towards 9 O`clock if RIGHT HANDED
Paddle palette knife and slide around cake towards 3 O`clock if LEFT HANDED
Move cake around until bare sponge is back to 12o`clock and repeat action with buttercream
Entire cake should be covered and look very messy!
Scrape up any excess buttercream.
With wet vertical palette knife go around the cake to remove excess buttercream
Repeat until it looks smoother.
Place huge “splodge” of buttercream on top of the cake.
Using wet horizontal palette knife, spread across until smooth.
Smooth edges with wet vertical palette knife
Chill in the refrigerator
Repeat with second coat of buttercream.
If you beat buttercream, it will appear to be a shade lighter than previous layer.
Icing Drip
The Icing Drip can be done in 2 different ways.
Water Icing Drip that will run wont set too firm. This is perfect if you like a soft finish and a natural drip. This can be coloured using any sort of food colouring and is quicker to make.
WATER ICING (GLACE ICING)
APPROX 300g Icing Sugar
Few drops of boiling water
- Add spoon full of Hot Water and stir
- Repeat until a runny smooth consistency is achieved
- If its too runny add more icing sugar
- If too thick add tiny amount of Hot Water
- This icing can be coloured and flavoured if desired.
Another finish is by using Royal Icing ` this will give a firmer finish and can set and be hand painted with a gold or lustre finish. It takes longer for it to set and finish. You must be mindful that it contains raw egg whites – sometimes this is not suitable for old / young / infirm or allergens.
ROYAL ICING
250g Icing Sugar
1 Medium Egg White
½ tsp Lemon Juice
1 tsp Water
- Sift the icing sugar into a mixing bowl
- Add the egg white and lemon juice
- Whisk with an electric mixer on a low speed (you don’t want too much air in the icing) for 2–3 minutes until you have a smooth, but not wet, stiff peak consistency.
- It should be thick but spreadable. If it looks dry and crumbly, whisk in a little water. If it looks runny and glossy, mix in a little extra icing sugar
- This can also be Coloured / Flavoured
Equipment & Allergens
- 2 x 6” cake tins (I prefer smaller tins on a tall stacked cake)
- Grease proof paper
- Stand mixer
- Palette knife
- Large plastic scraper
- Food colours
- Food flavours
- Piping bags
- Star piping nozzles
- 8” round cake drum (thick board)
- 6” cake round thin
- 2 doweling rods or large thick straws
- Cake toppers of choice
- Butterflies or flowers look lovely
ALLERGENS
GLUTEN
DAIRY
EGGS
LINKS TO MAKING SUGAR ROSES
Fast & Simple Sugar Rose Tutorial – Oat Milk & Cookies
This is a very simplistic version of Roses made with a very easy technique.
Once you have mastered this – look for more indepth and advanced techniques.
We hope you enjoyed the class!
If you have any feedback about the class or questions for chef get in touch. Email: lovetocook@foodsorcery.co.uk
Spread the word! let other know about your experience on TripAdvisor Deansgate Google Didsbury Google
Take a Look at our cookery classes. Gift vouchers are available and never expire.
